Using the interface to create an area of interest and modify your flight path
Selecting an Area of Interest
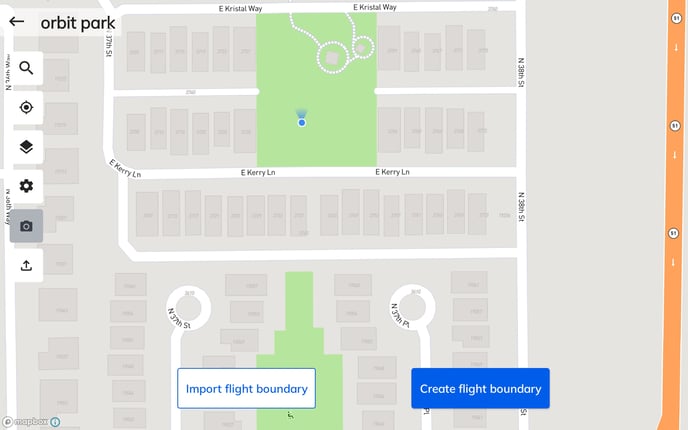
Now that you’ve zoomed in to a satellite view of your location, you can select the Area of Interest that you want your drone to fly over taking pictures. Mapware Fly then calculates an optimal flight path for your drone to cover the Area of Interest.
Here is how to create a simple square Area of Interest:
NOTE: You also have the option to Import a flight boundary via a shapefile or .kml by using the import flight boundary button. Make sure if you use a shapefile that all of the necessary files are included in a singular zip file before attempting to upload. Either the shapefile or .kml should be a polygon of the area of interest, and then you can adapt the flight path using the parameters.
- Press the 'Plan mission here' button
Mapware Fly now has enough information to construct a flight plan. You’ll see the polygon filled in with a zigzagging line representing the drone’s flight path, and labels for the Start and End points. Mapware Fly will automatically take the right number of photos in the right spots to completely capture your Area of Interest. You can see the image locations for the flight represented by white circles on the flight path.

You can create any polygon shape, but we recommend a triangle, rectangle, or square for the best flight path. To modify the polygon, you can drag any of the blue vertices by pressing and dragging to the desired location. To create additional vertices, you can tap any of the white (transparent) vertices to create a modifiable blue vertex. To delete vertices, you can long press a blue vertex and an option will appear to delete.
To move the polygon to a new location, tap and drag the move icon in the middle of the polygon.
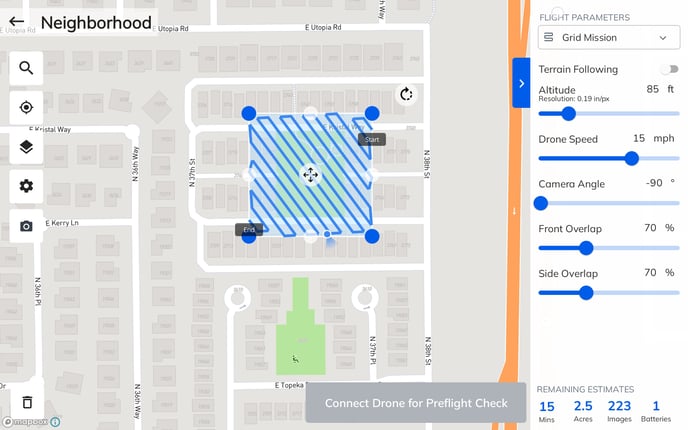
To rotate the flight path inside of the polygon, press and drag the rotate icon above the polygon to either the left or right to get the desired rotation. Imagine that there is a line above the area of interest that represents -180 degrees -> 0 degrees -> 180 degrees. For example, dragging all the way left results in a -180 degree rotation and all the way to the right is 180 degree rotation. The rotate icon will remain in the location you dragged it in to represent the amount of rotation the flight path currently has. If you drag the rotate icon close to the center (0), it should snap to revert back to the default rotation.
Tap either the word Start or End in order to flip where the drone starts or ends the flight.