This article covers all of the settings available for your account profile in Mapware.
Manage your Account Settings
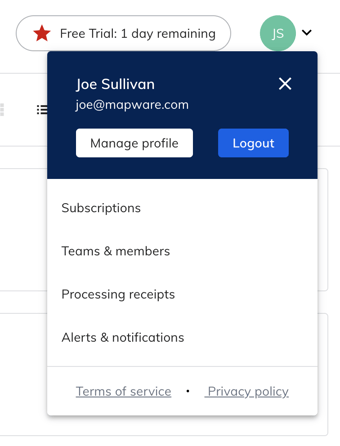
To access your settings, click on the initialed icon in the upper right hand corner.
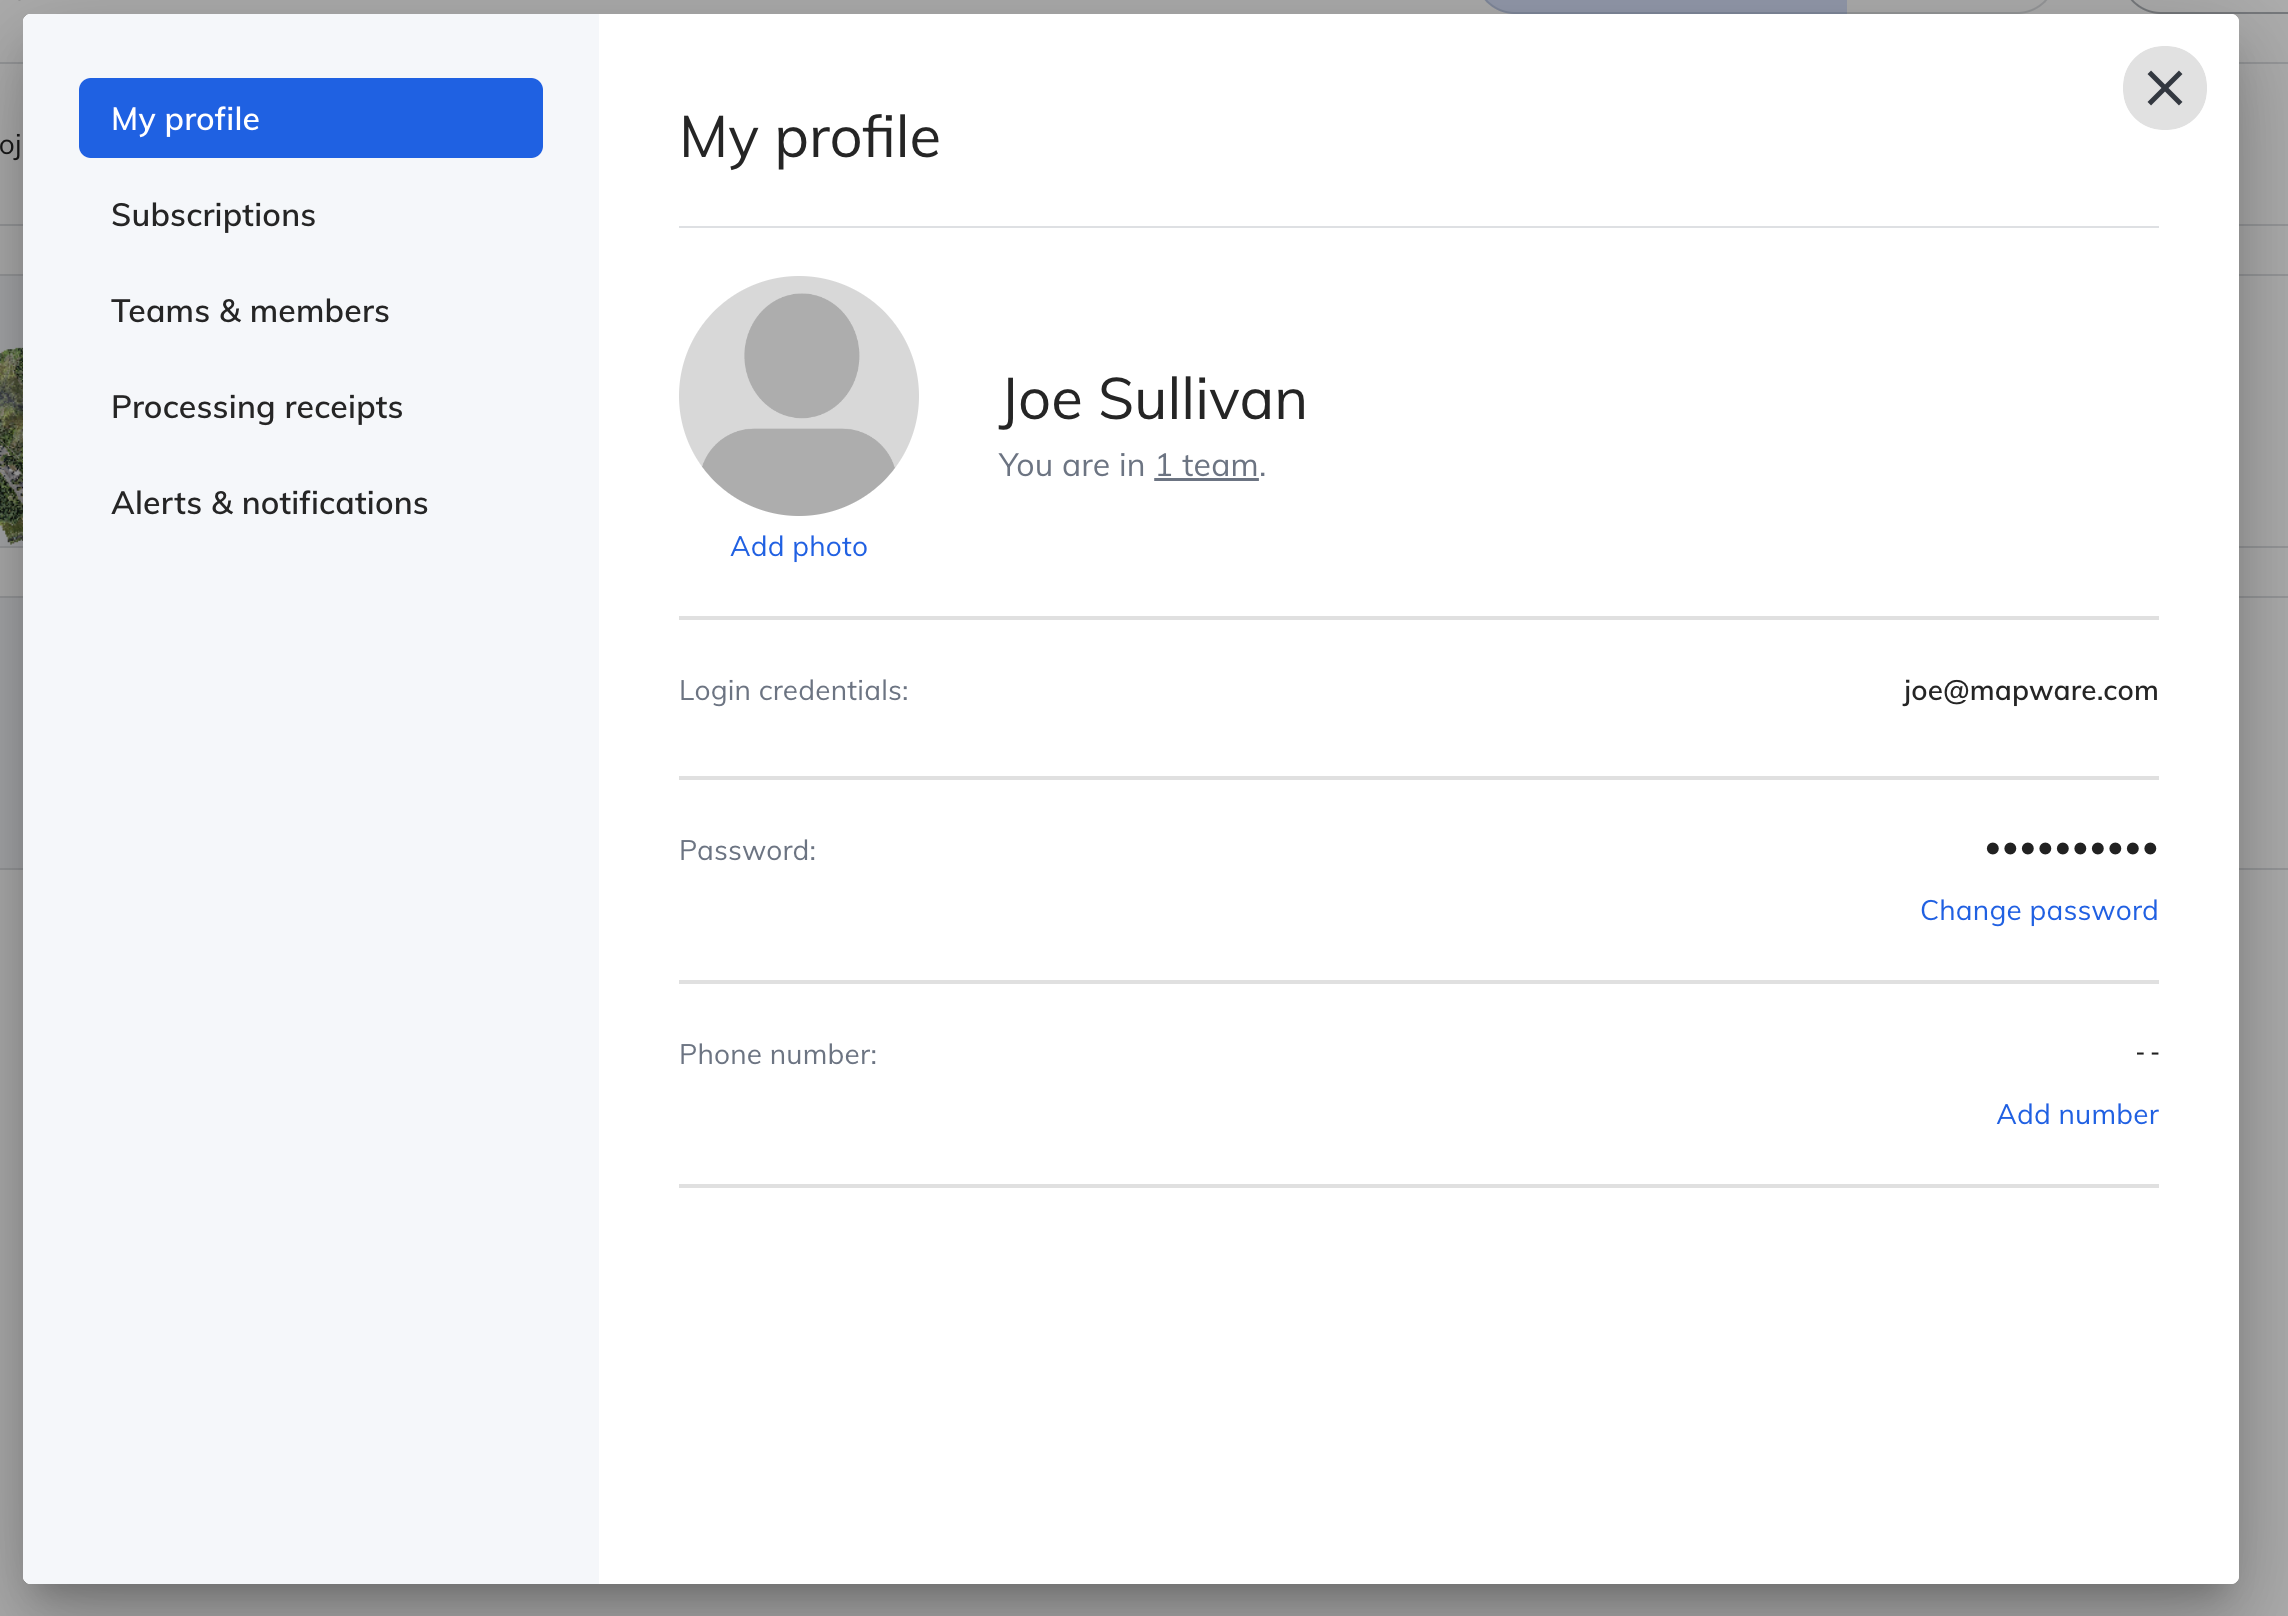
My Profile
Your profile contains information associated to your Mapware Account and the ability to change certain information.
- Add Photo will allow you to update your avatar photo that represents your account.
- Login credentials will let you know which email you have associated to your account.
- Change Password will allow you to update your password if you wish to change it.
- Add Number will allow you to add a phone number to associate with your account. This can be helpful if you would like our customer support reps to be able to contact you for support with your projects. We will never sell or give away this number without your permission.
Subscriptions
From the Subscriptions tab you can select your payment plan. This page allows you to toggle between Monthly and Annually to see available plans, as well as select the plan which you wish to select.
For more information on our pricing plans and the features they contain, visit our Pricing Page.
In order to purchase a subscription:
- Make a choice on which subscription you would like to purchase.
- Click Proceed to Checkout
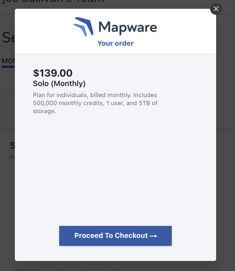
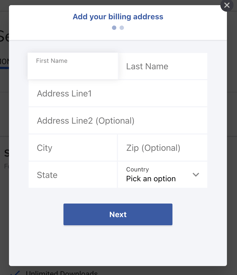
- Enter your billing address and click Next
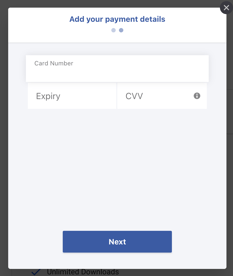
- Enter your credit card details and click Next
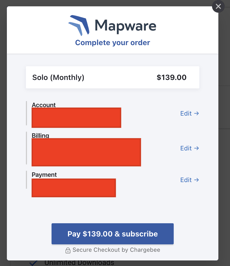
- Confirm everything looks good on the summary page and click Pay $$ & subscribe
NOTE: Billing is associated to a team, meaning that everyone who is added to your team will have access to that billing tier. However, if you create a separate team, that team will have separate billing details attached. This can be useful if you are managing multiple clients.
Teams & Member Permissions
Mapware uses Teams to organize which users are able to access which projects and subscription plans. This is helpful for large organizations that have different groups that want to use the application for different purposes. Or smaller organizations looking to manage multiple clients. Using the teams functionality, you can easily share your entire workspace with other users.
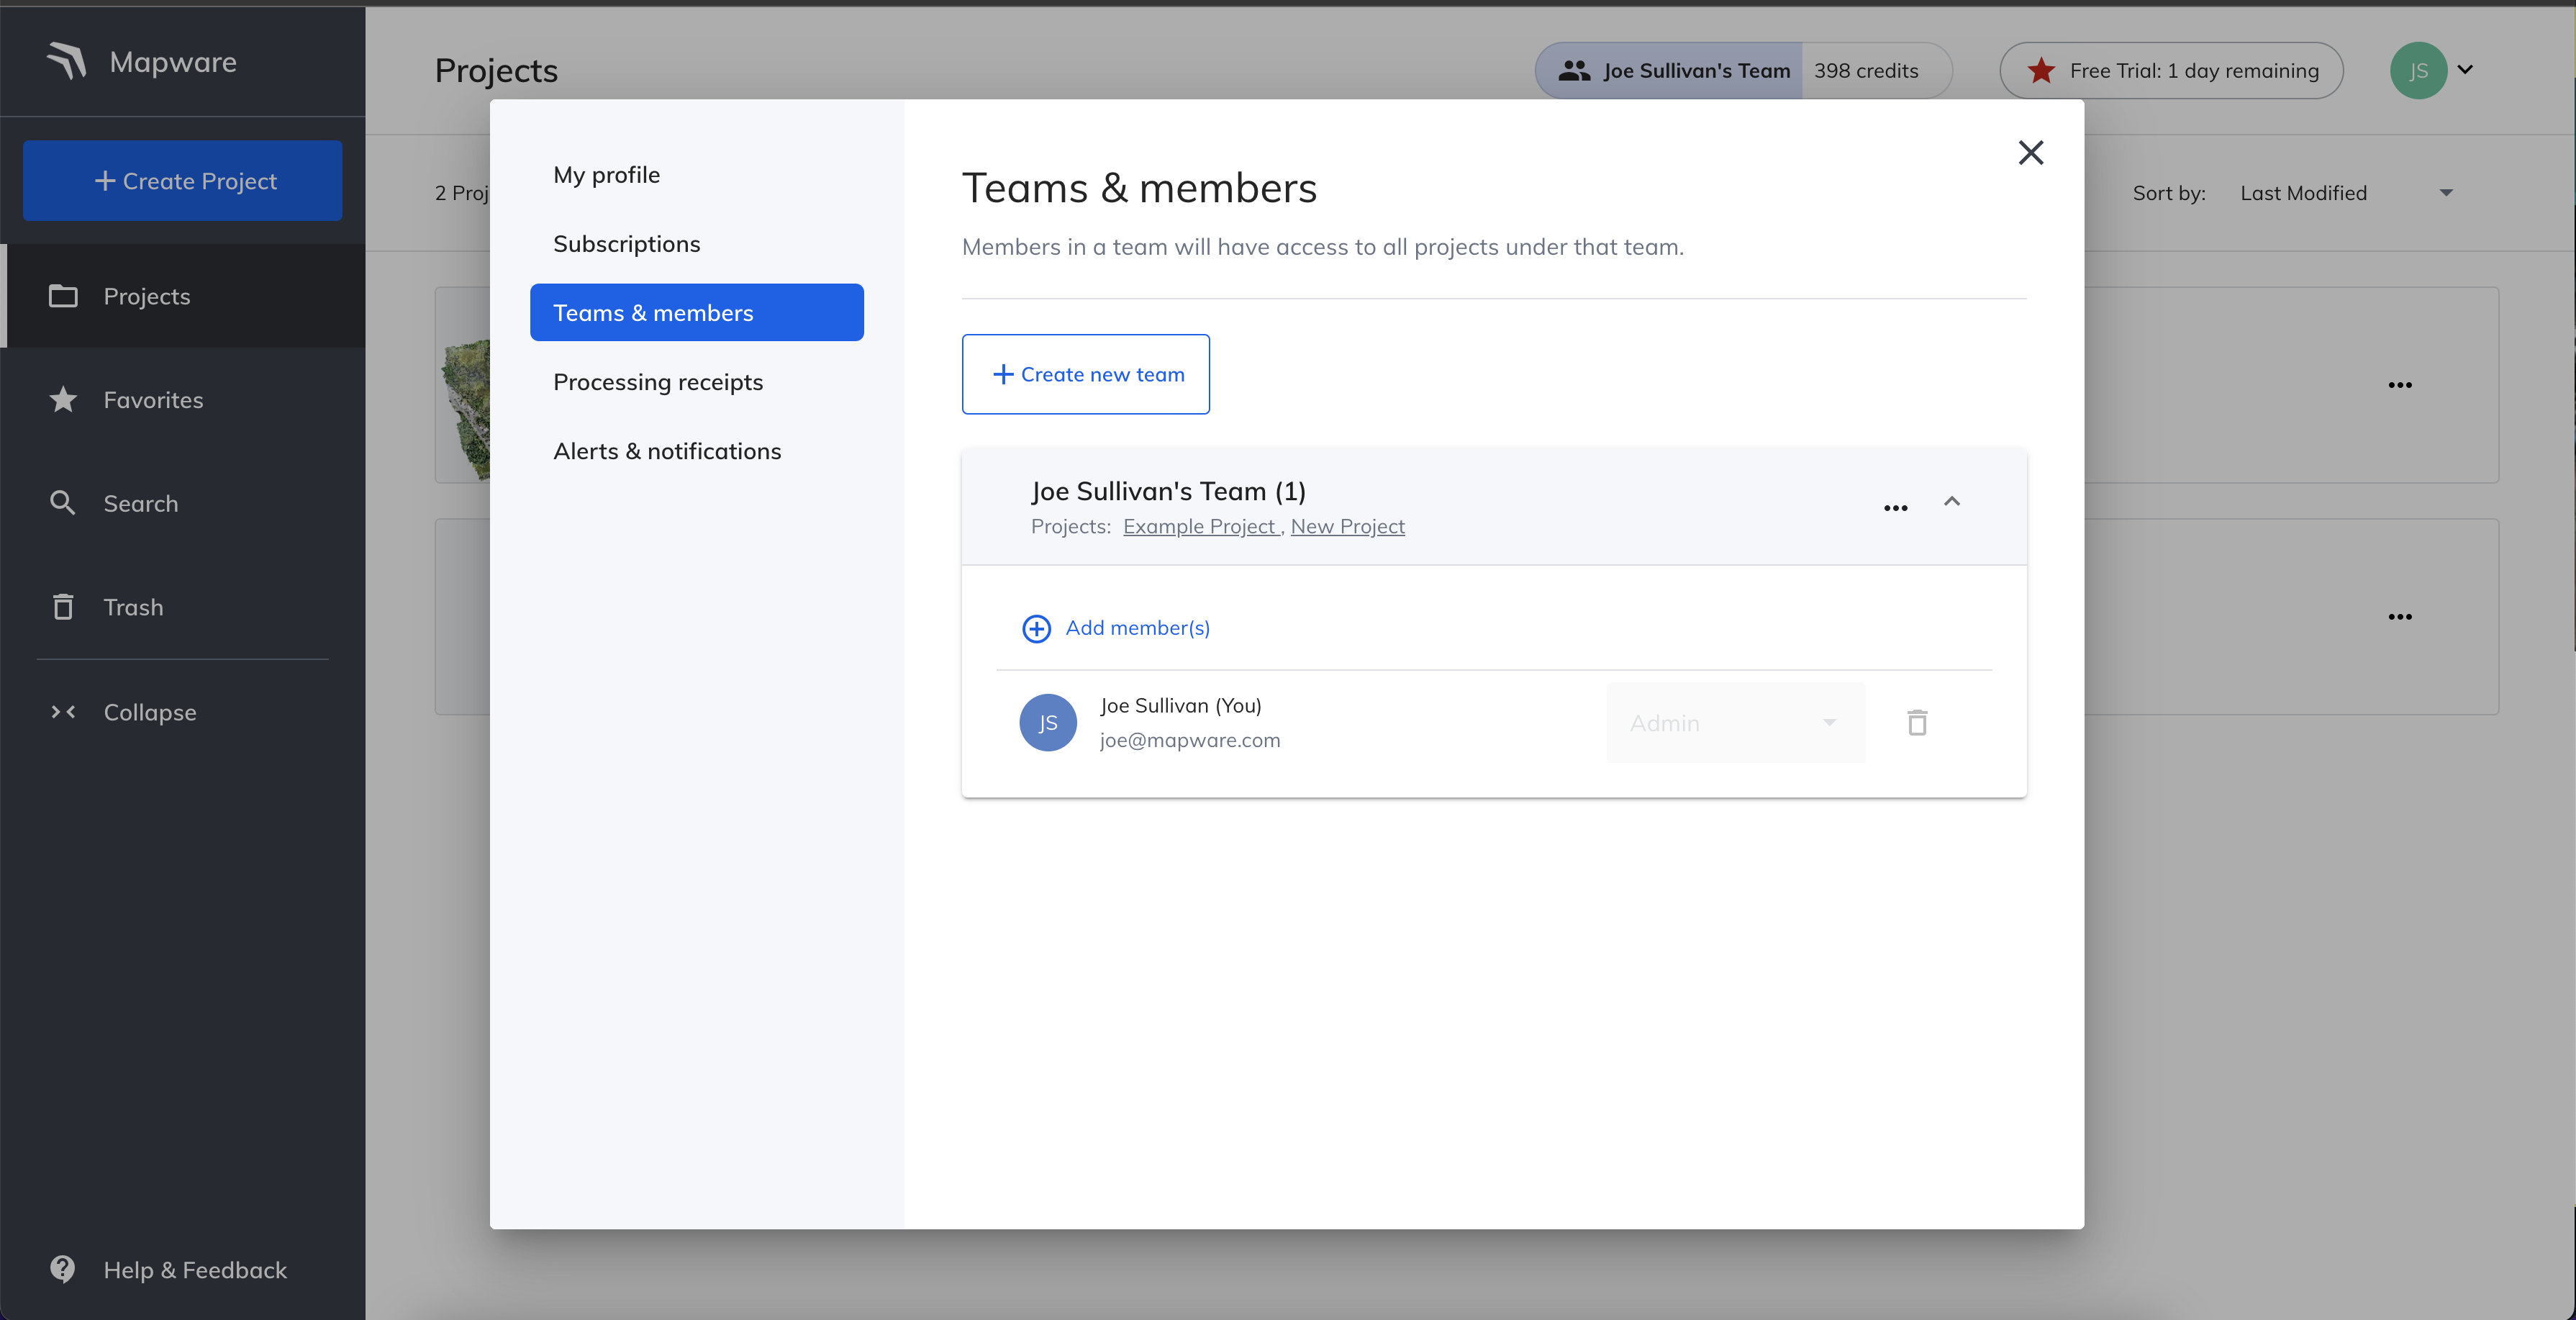
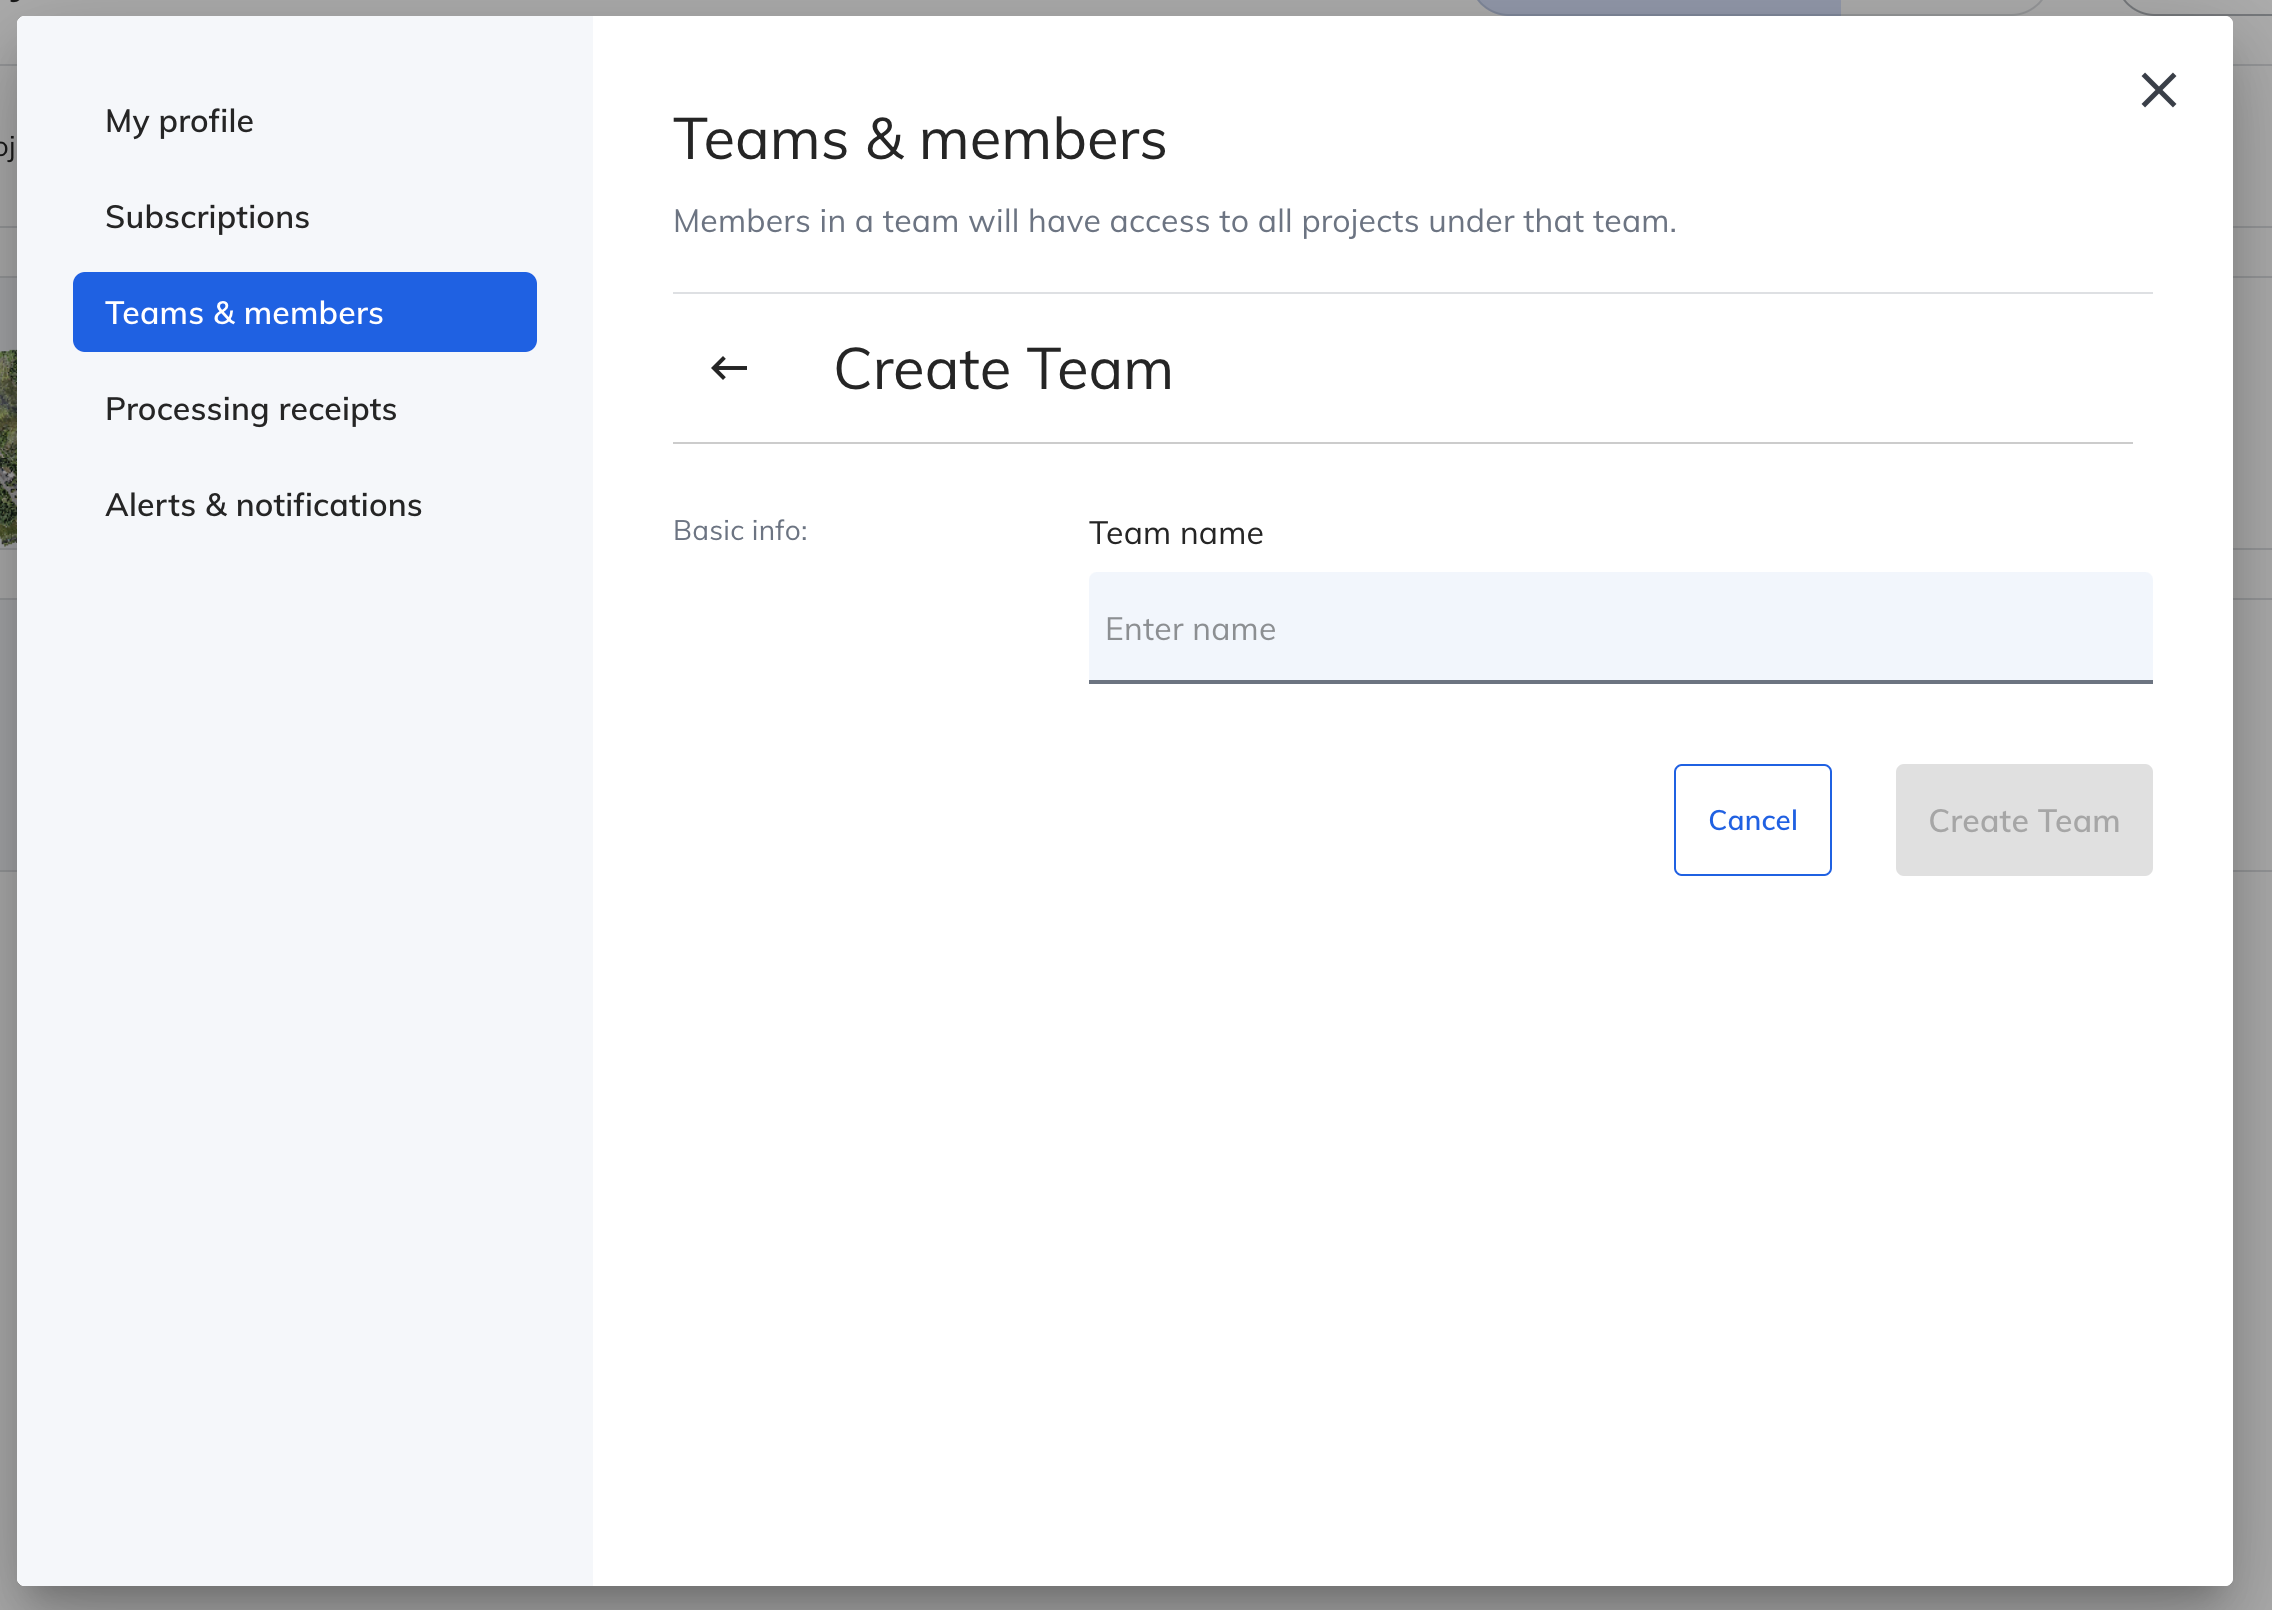
Click Create new Team in order to create a new team. You can create as many teams as you want, but keep in mind additional teams are not given additional credits for free trials, nor do any subscriptions transfer. Give the team a Name and click Create Team.
Click Add Member(s) in order to add additional users to your team. Input the user's email address into the input box and select the level of permissions you wish the user to have. Click Send Invite to send the user an email with a link to your team. They can be either an existing user or a new user to Mapware.
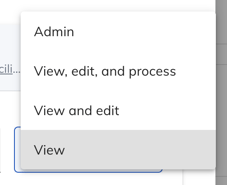
When adding a user, you can set the permissions to one of 4 options:
- Admin: Gives full permissions to the user.
- View, edit, and process: Allows the user to view, edit and process models.
- View and edit: Allows the user to view and edit models, but not process new models.
- View: Allows the user to view the project, but does not allow the user to make any other changes to the available data.
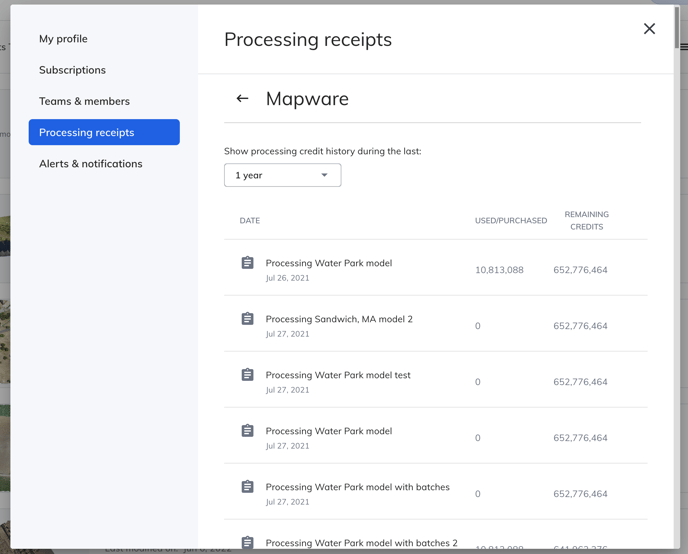
Processing Receipts
Here you can view receipts for all previously processed models. All model processing requires credits and this list will show how many credits were used (or purchased) for each processing job and how many credits remained on the account. Selecting the dropdown will allow you to select the timeframe you wish to see in the list.
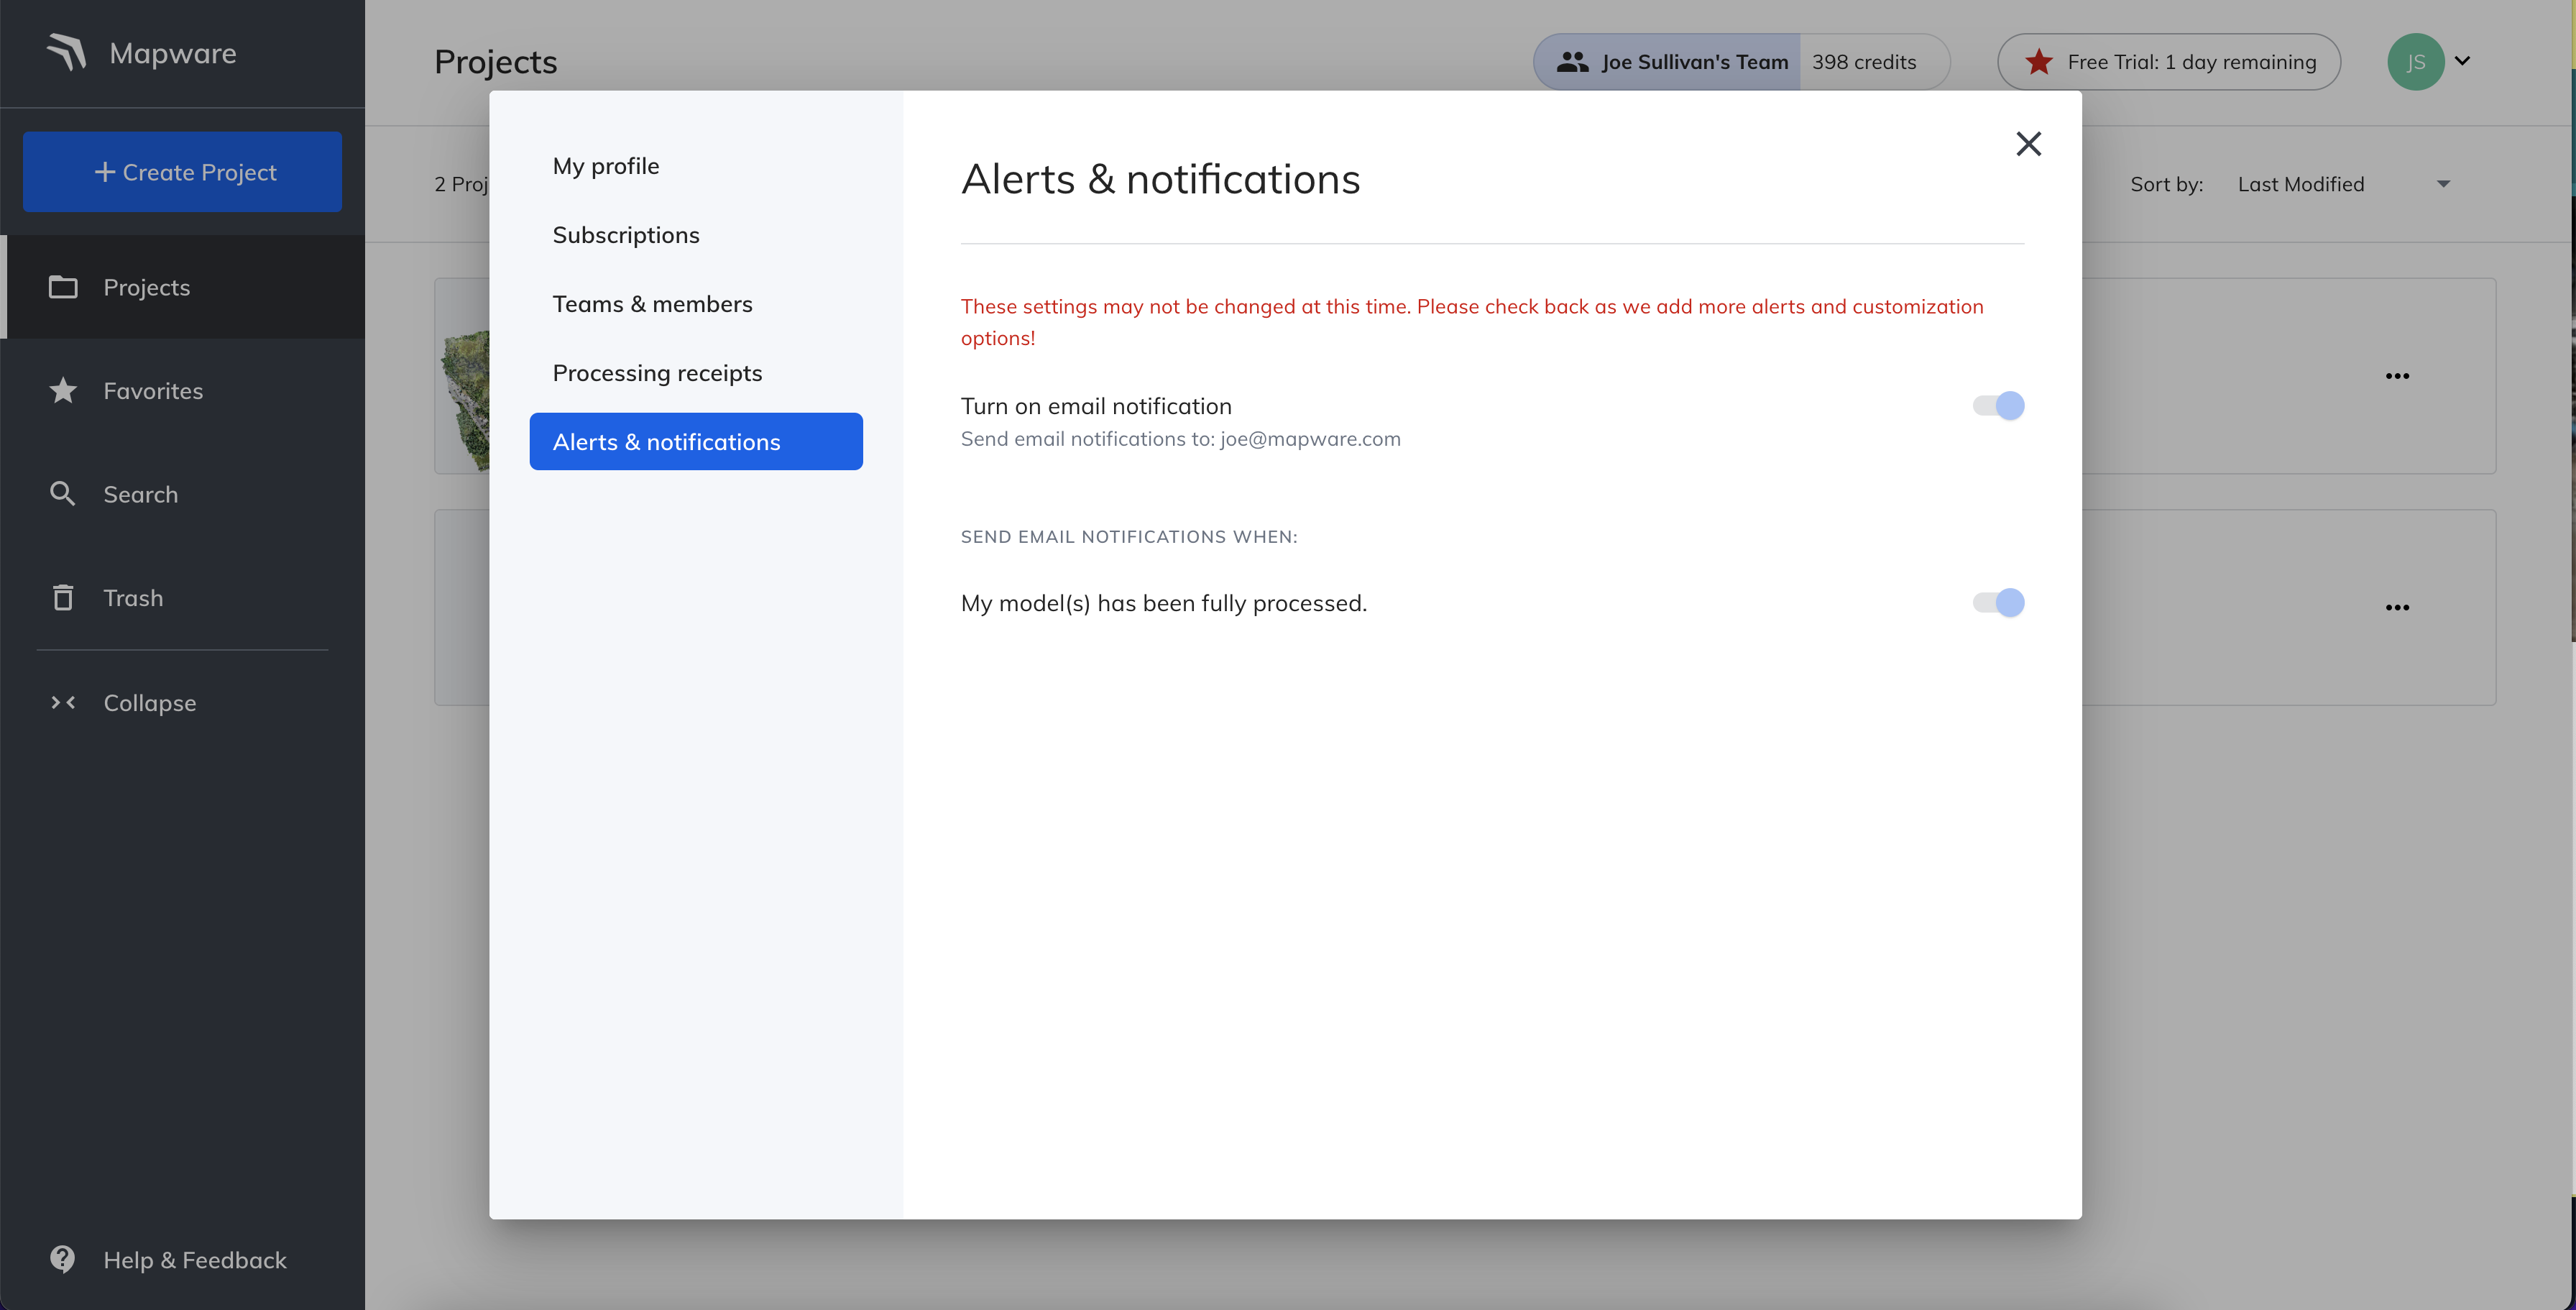
Alerts and Notifications
Currently we do not allow any modifications to your alerts or notifications in the application. However, we expect to add more functionality here in the future.